Vajrasana (Thunderbolt Pose)

by Lindel Hart
If there’s one pose that I KNOW will elicit grimaces as soon as I say the name, it’s Vajrasana. Even though it’s a simple seated pose, many people struggle in Thunderbolt Pose because of pressure on the ankles and the tops of the feet, as well as potential tightness in the hips, hamstrings and quadriceps. But it’s a pose worth doing…and worth doing every day.
Vajrasana is a seated pose that helps improve posture and can increase foot flexibility. I incorporate this pose into nearly all of my classes because most of us can benefit from increasing the flexibility and range of motion in our toes, the soles of our feet, and our ankles. As the foundation of nearly everything, the health of our feet is extremely important. You may need some modifications to make Vajrasana more accessible, and if so, don’t hesitate to use your props. Using props is not cheating — it simply makes poses more available to you!
Follow the steps below to incorporate Vajrasana into your daily routine, whether it’s part of a yoga practice or not.

Assess the comfort of your knees, feet, and ankles
Vajrasana (Thunderbolt) presents challenges to a lot of people for a variety of reasons. Some feel enhanced pressure in the knees if their knees are already sensitive, so be mindful of that and modify it with the props as shown below.
The most common complaint I hear from my students centers on discomfort in the ankles and toes, sometimes the soles of the feet. And while this sensation can be unpleasant, it dissipates when you come out of the pose. Unless you have a broken toe or some other foot malady, you should be able to inhabit Vajrasana for a few breaths with only minor discomfort.
Listen to your body, and try Thunderbolt with some modifications at first. Ease into it!
Setting up for the standard version of Vajrasana
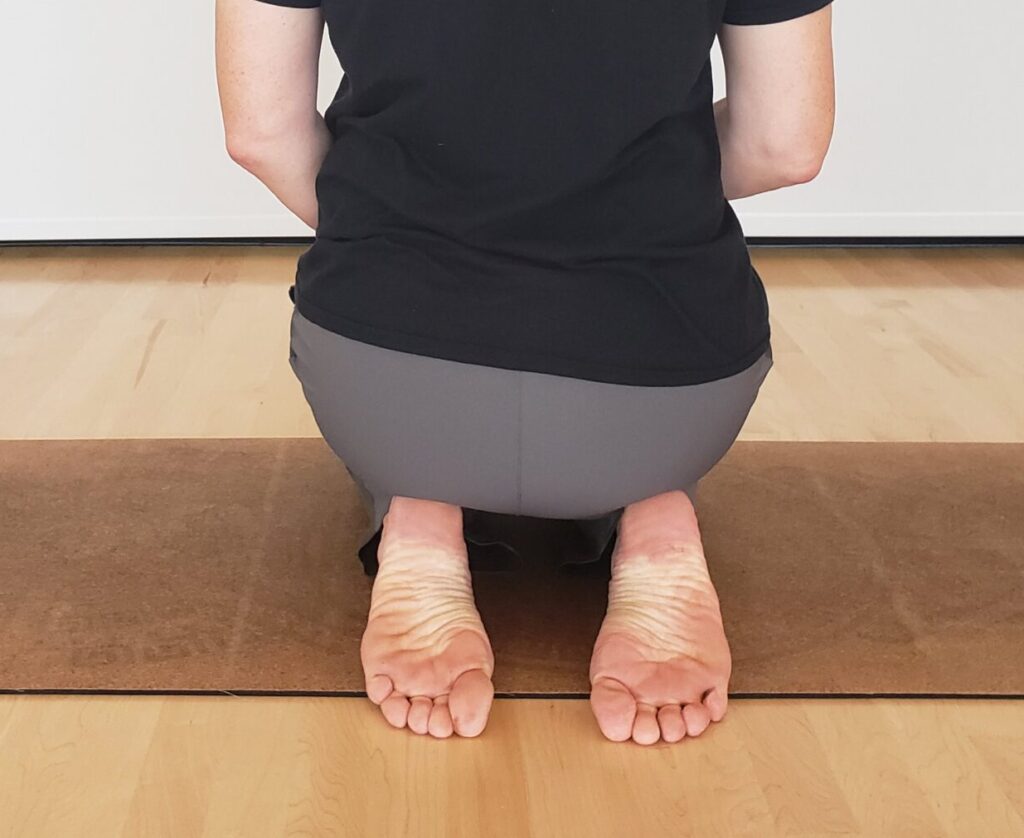
Come to a kneeling position with your knees hip-width apart and your thighs perpendicular to the floor.
Extend your lower legs straight back from your knees so that your shins are parallel to each other. Some teachers instruct students to bring their big toes together, which angles their feet inward. I don’t subscribe to this approach because it can put undue stress on the outer ankles. Instead, I recommend extending your feet straight back, keeping them parallel, as well. This keeps the ankles in a neutral position and ultimately makes Vajrasana healthier, in my opinion.
Sit back slowly and lower your sitting bones to perch on the backs of your heels. Take it a little at a time in order to monitor the comfort in your knees. You can now tilt your pelvis forward slightly, which allows your spine to lengthen and your sternum to lift. This, in turn, opens your chest.
Modifications for the Knees and Ankles
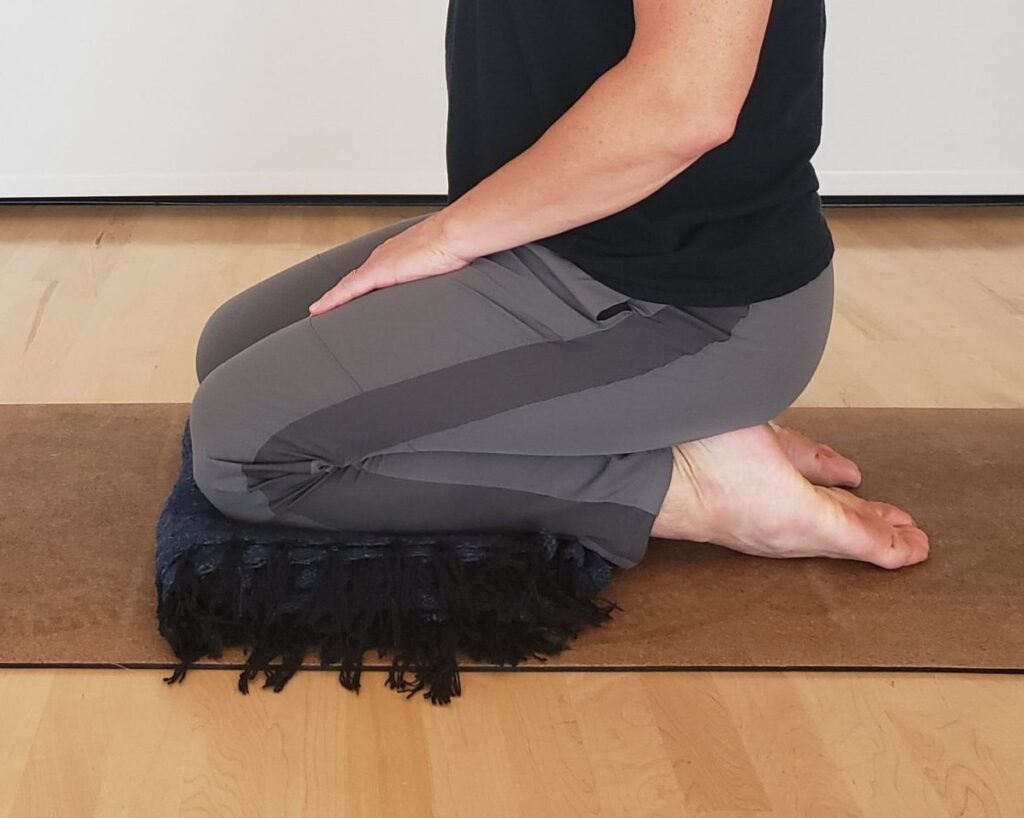
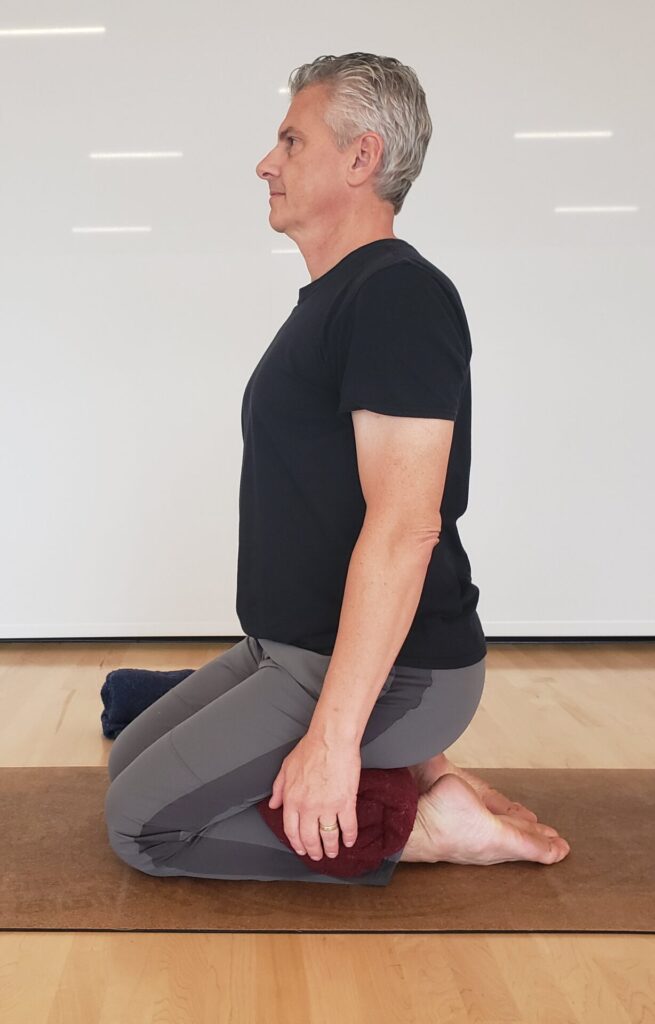
← Place a blanket under your knees if you need some extra padding.
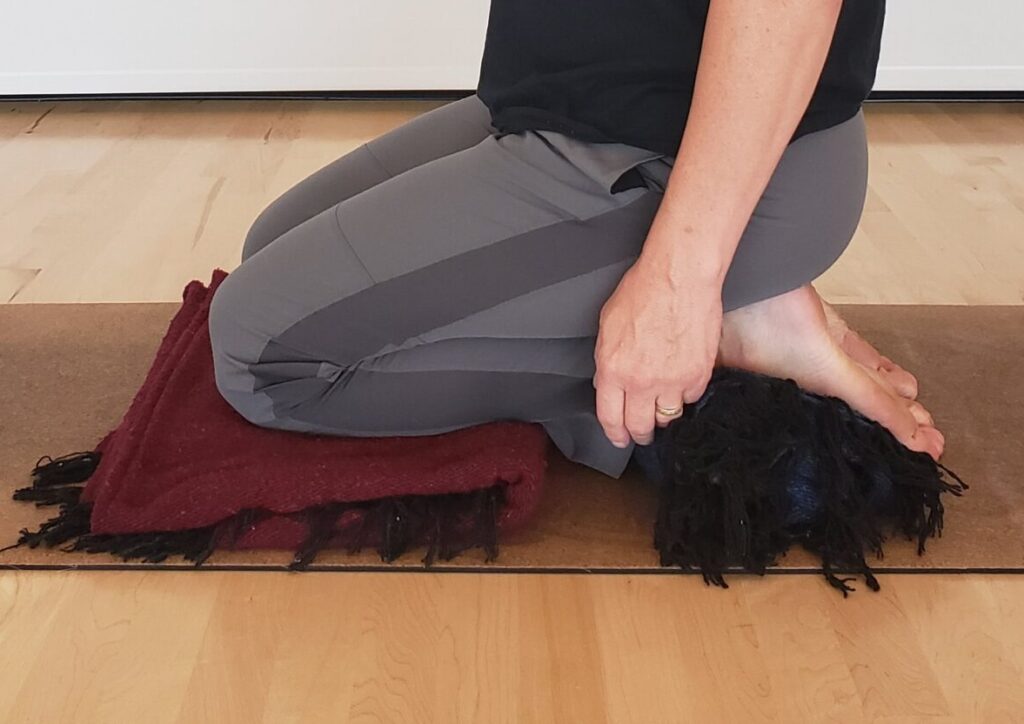
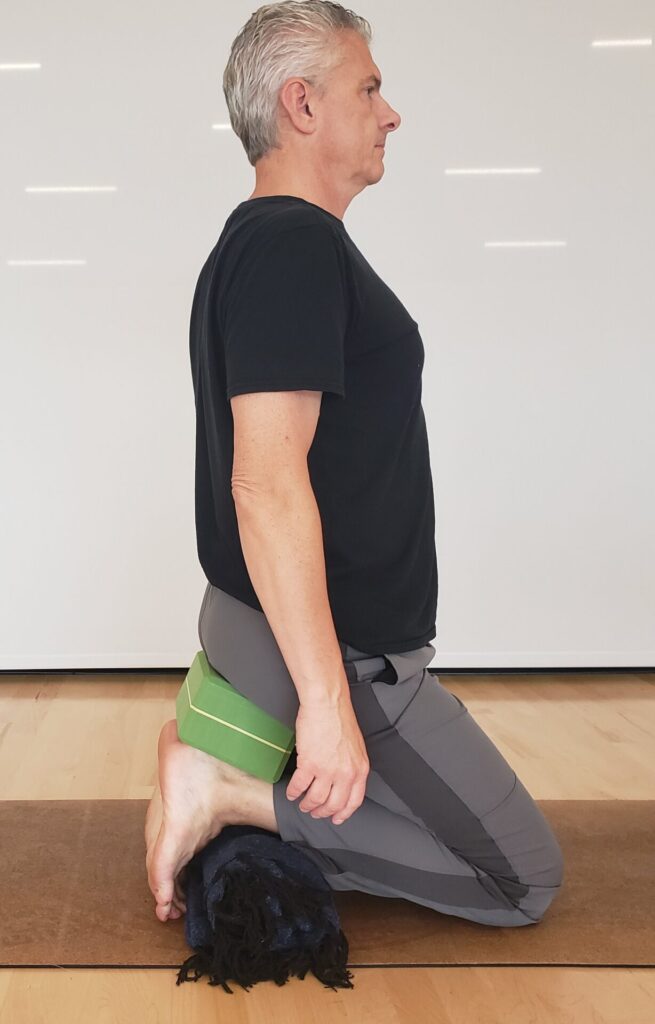
If your ankles feel overtaxed because your feet just don’t bend that deeply into plantar flexion (pointing the toes), you can add a rolled blanket under the ankles. →
These two modifications can vastly improve the comfort of Vajrasana for most people. Try one or both of these and see if they’re helpful to you.
Hips to Heels…or not
Let’s say you didn’t need the modifications above. Or maybe you did. There’s still the issue of sitting back on your heels. I’ve had numerous students who simply can’t do this. Tightness in the quadriceps (thigh) and/or hamstrings or limited mobility in the knees can contribute to this situation.
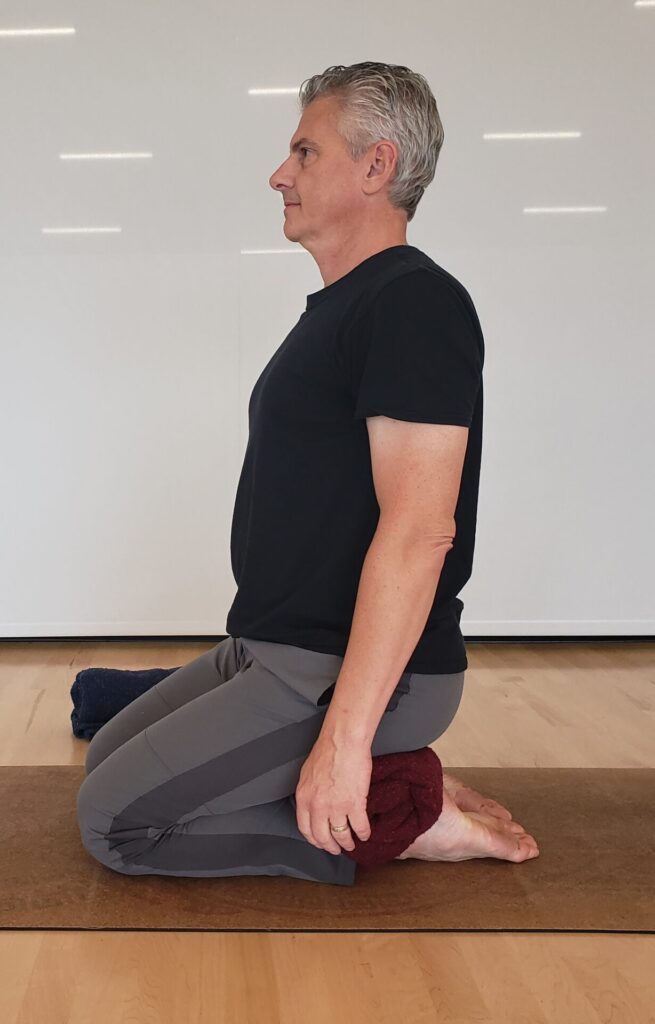
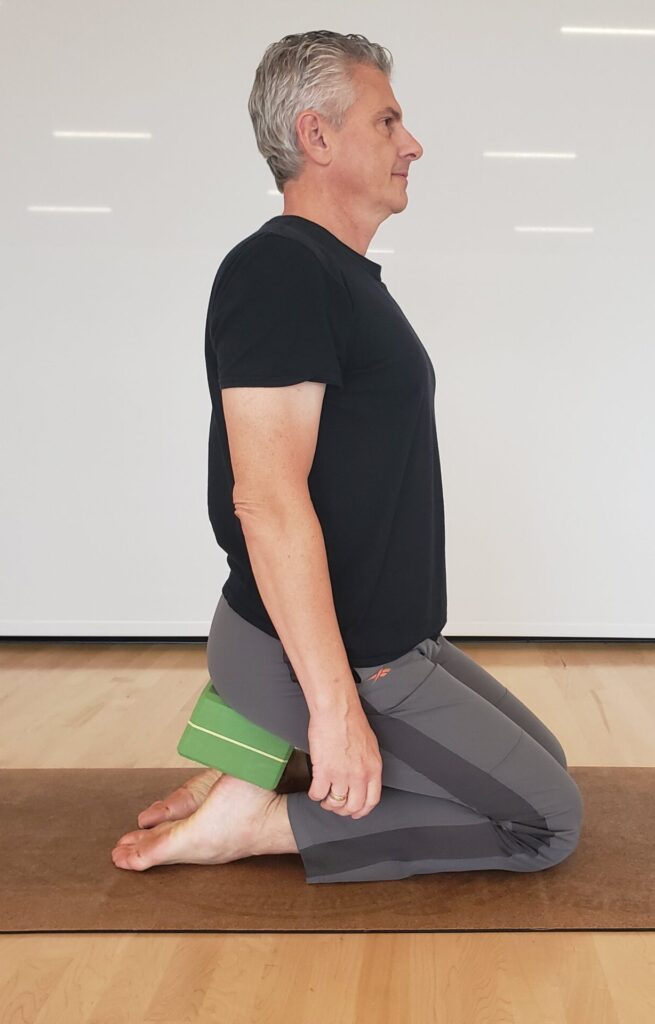
Fear not! Help is on the way. Try wedging a rolled blanket between your sitting bones and your heels. Or move it behind your knees.
You might even want to use both. If you have enough blankets (or even thick towels), you could combine them in any of these four options — under the knees, under the ankles, behind the knees, between the sitting bones and heels.
More Options
Maybe you don’t have extra blankets. You can use a block between your sitting bones and your heels. (Pad it by wrapping it in a towel or blanket to make it feel softer.)
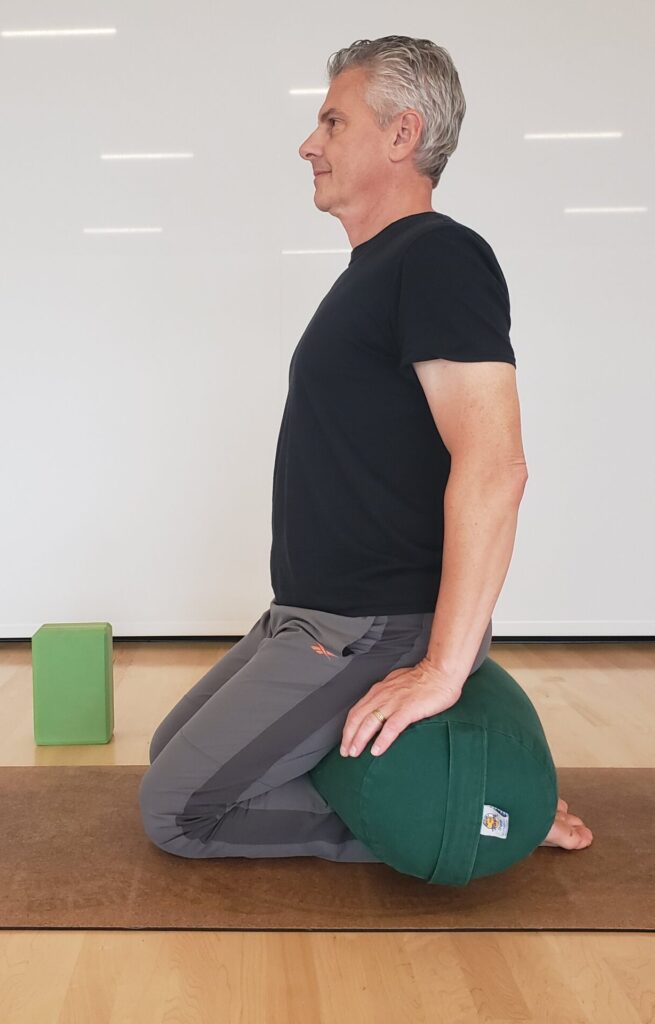
Or best of all, if you have a bolster, place it on the backs of your ankles or calves and perch on the bolster. It will elevate you significantly and make Vajrasana so much more pleasant. By raising your pelvis, you can more easily tilt it forward slightly, which lengthens your spine, lifts your sternum, and opens your chest.
Mix it up — Version 2
Now that I finally got your comfortable in Vajrasana, I’m going to make you change it. But stay as long as you like. I’ll wait!
The second version of Thunderbolt requires only a simple change, but it can be an even greater challenge for the feet. I’ve seen grown men cry in this version. (Just kidding. But the pained expressions on their faces signaled that tears would soon be springing forth if they didn’t get out of the pose.) I’m not trying to scare you off; just preparing you for some intensity. So let’s go.
Oh, Those Toes!
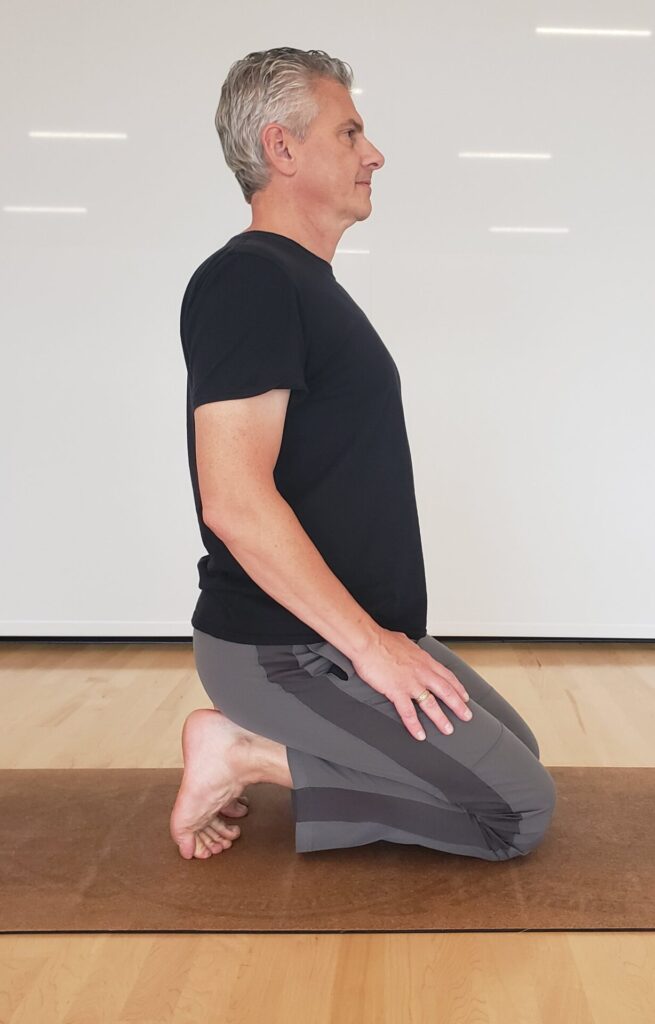
Rise up onto your knees again and curl your toes under. You can still use the same props you used before, but you may need to reorganize them a little. Your block might have fallen, for instance.
Now SLOWLY sit back. Maybe you can sit back on your heels easily. Or maybe you need some props. You can apply the same propping to this version as you did to the first: a blanket under the knees, a rolled blanket under the ankles (although in this version the ankles are usually fine), a rolled blanket behind the knees or between the sitting bones and the heels, or even a block or a bolster.
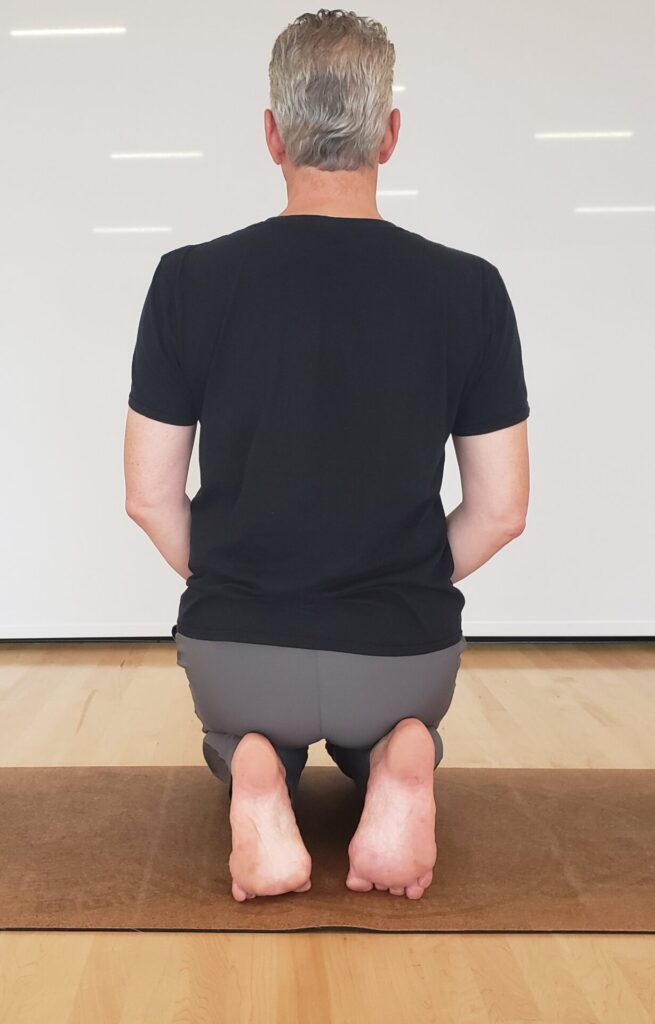
Diligence Pays Off!

Some people find this version of the pose to be, in a word, excruciating! Others prefer it to the first one.
The important thing to remember is that you should prop yourself so that it’s at least tolerable, if not pleasurable.
I encourage you to spend a little time every day in Vajrasana. Do the first version for 30 seconds, then do the second. Gradually increase the time that you spend in the pose. Even if you keep it to a total of 1 minute each day, you’ll be doing your feet so much good! I predict that you’ll start seeing a difference in your comfort level before the end of the second week. Stay with a daily dose of Thunderbolt, and you’ll see an improvement in your foot and ankle flexibility, as well as your posture while seated. You might even come to like it!

Lindel Hart teaches yoga online for PerfectFit Wellness. He lives in Western Massachusetts and teaches at Deerfield Academy, a private residential high school, as well as at Community Yoga and Wellness in Greenfield, MA. Visit his website, Hart Yoga.


[…] Vajrasana (Thunderbolt Pose) ankles feet Hart Yoga Lindel Hart Perfect Fit Wellness posture Thunderbolt Pose Vajrasana […]