Urdhva Prasarita Padasana: Tone Your Core!

When you hear “core” or “abs”, do you think of the so-called “six-pack” look so prized that it perennially motivates people to hit the gym and get ready for summer? If so, you’re thinking of the rectus abdominus — the superficial flat abdominal muscle that ripples on some bodybuilders and models from just below the sternum to well below the navel. A tanned, fit “beach body” may feature the rectus abdominus prominently, and while it’s a significant postural muscle responsible for bringing the spine into flexion and aiding in breathing, it’s not a “heavy lifter”. The abdominal muscles we typically need to strengthen are ones which lie deeper in the abdomen, such as the psoas. To that end, we’ll be focusing on Urdhva Prasarita Padasana.
Welcome to Your Psoas
The psoas are a pair of muscles that attach to the front of either side of the lumbar spine and run through the interior of the pelvis to attach on the upper inner thigh. They connect the upper body to the lower body and are a major player in hip flexion, such as bringing your knees toward your torso. The psoas also have a key role in healthy postural alignment. You use your psoas muscles all the time — for standing, walking, and running; for jumping and dancing. Your psoas muscles help keep you mobile and free from pain in your lower back.
Build Core Strength
My favorite “core-strengthening” yoga pose (to use a general term for it) is Urdhva Prasarita Padasana. The literal translation of “raised stretched-out foot pose” is cumbersome and not particularly enlightening, and a more generic name for it, Yoga Leg Lifts, has unfortunate connotations — for me, at least. My high school gym teacher divided us into groups to play sports and punished the losing team by having us do leg lifts at the end of class. (There was very little physical education in those Phys Ed classes.)
Whatever you choose to call it, Urdhva Prasarita Padasana helps strengthen and tone the entire range of the deeper abdominal muscles, especially the psoas.
Let’s Get Started!
You won’t need any props for this pose, but if you need to modify it, a wall might be useful. More on that later.
Begin by lying down on the floor. Extend your legs and allow your spine to settle comfortably into a lengthened position, which sometimes requires a moment or two. Your spine spends much of its time keeping itself erect and balancing your head on its uppermost vertebra; coming into a relaxed position may require a bit of letting go. Be patient.
Classic v. Alternative
At this point, I offer you two ways to approach Urdhva Prasarita Padasana. The first is aligned to the more classic version of the pose, and the second is a modification that may be easier for your lower back. Both are effective, so go with what feels right for you, and if you need further modifications, I’ll offer those later.
The Setup
Classic
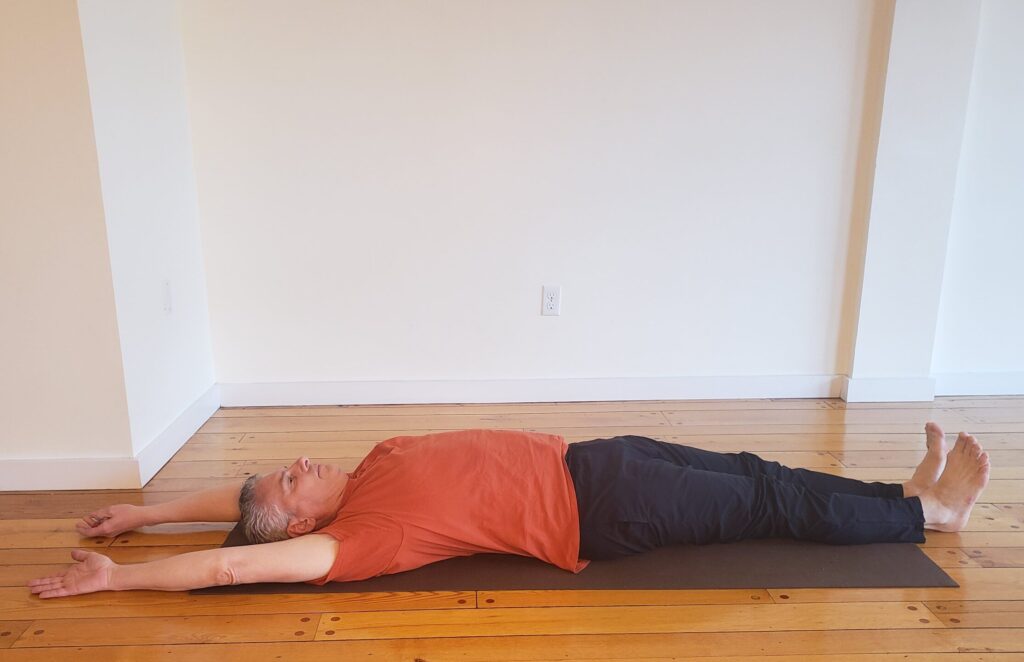
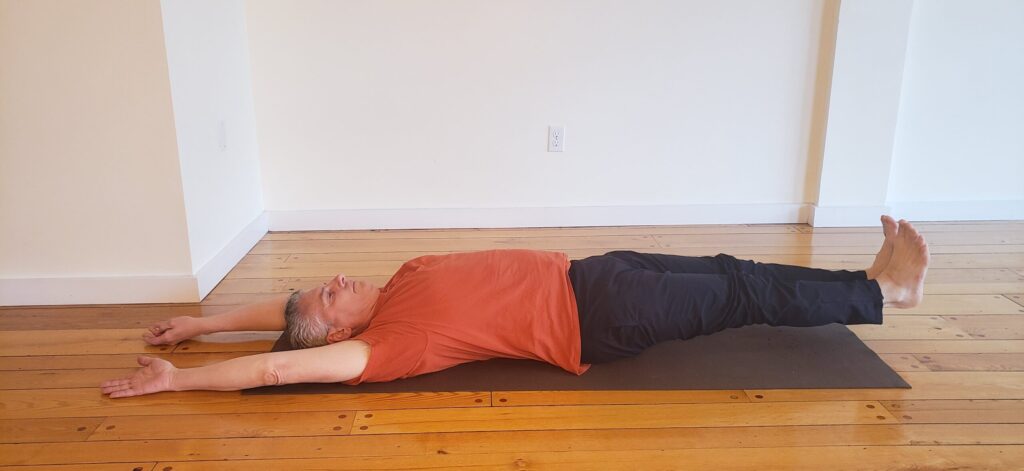
As you lie on the floor, raise your arms overhead and let the backs of your hands rest on the floor behind you. If you have to bend your elbows, widen your arms apart until you can fully extend them.
Alternative
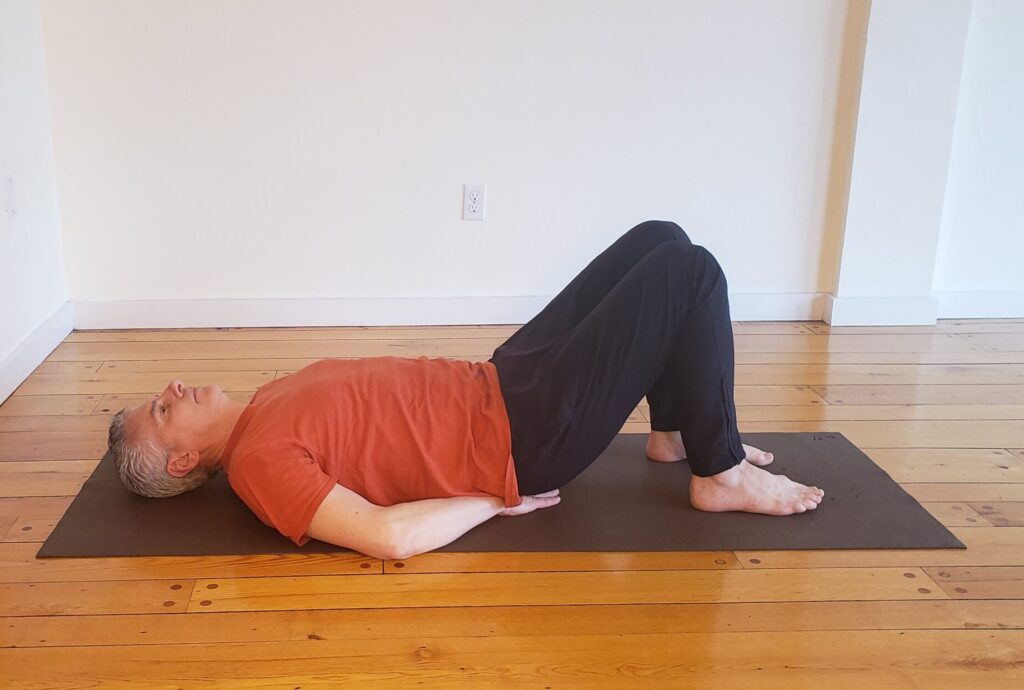
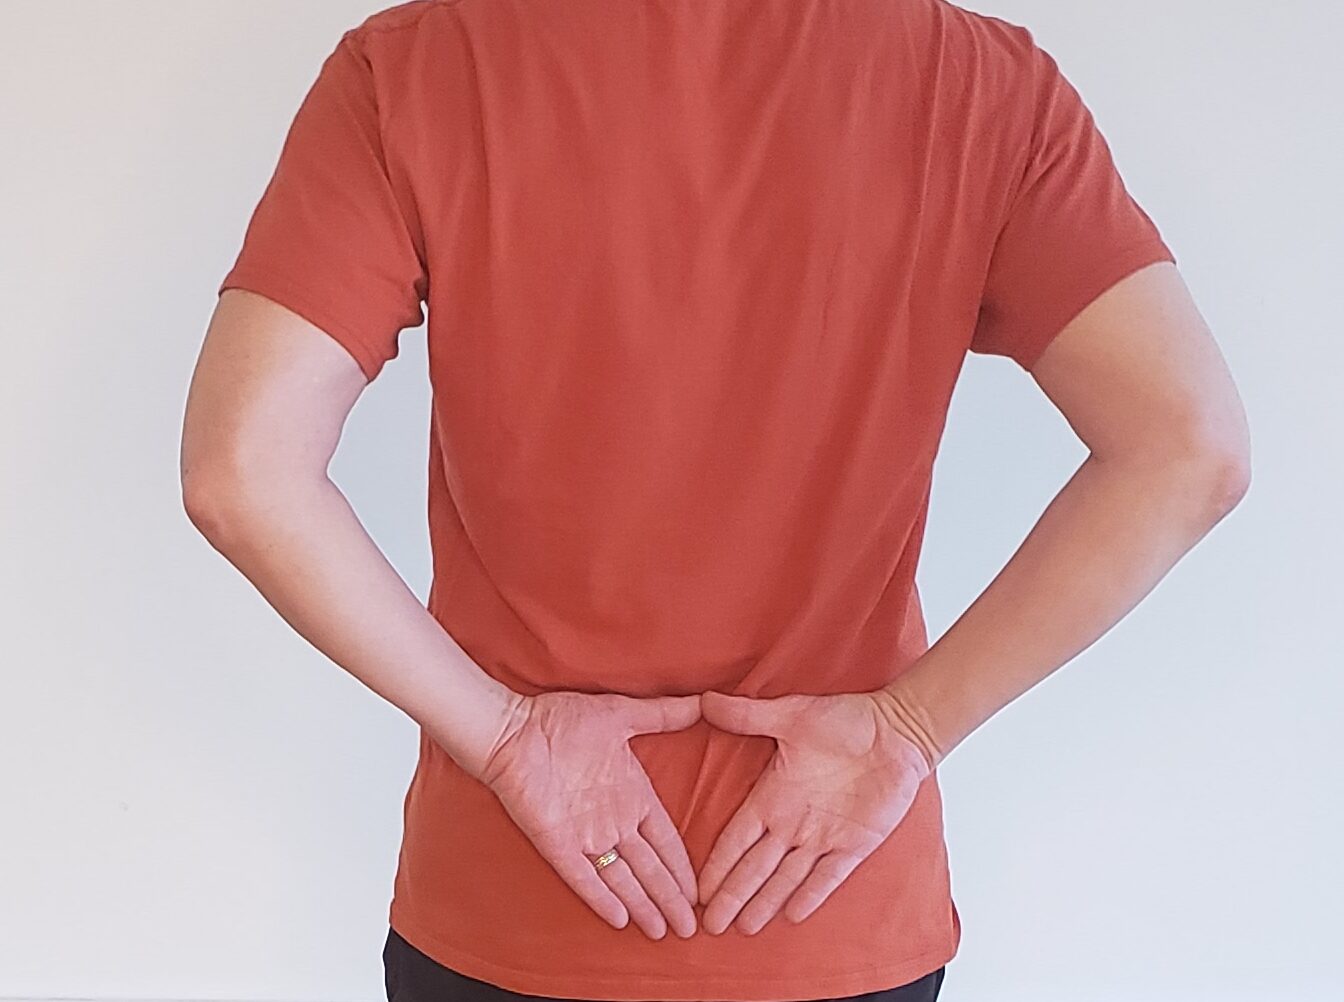
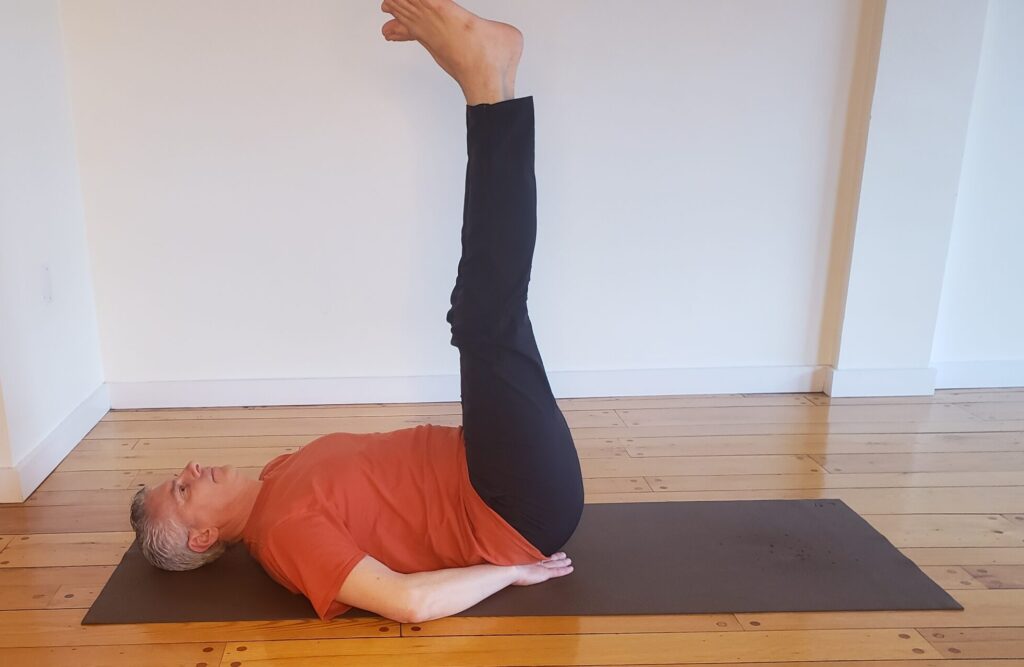
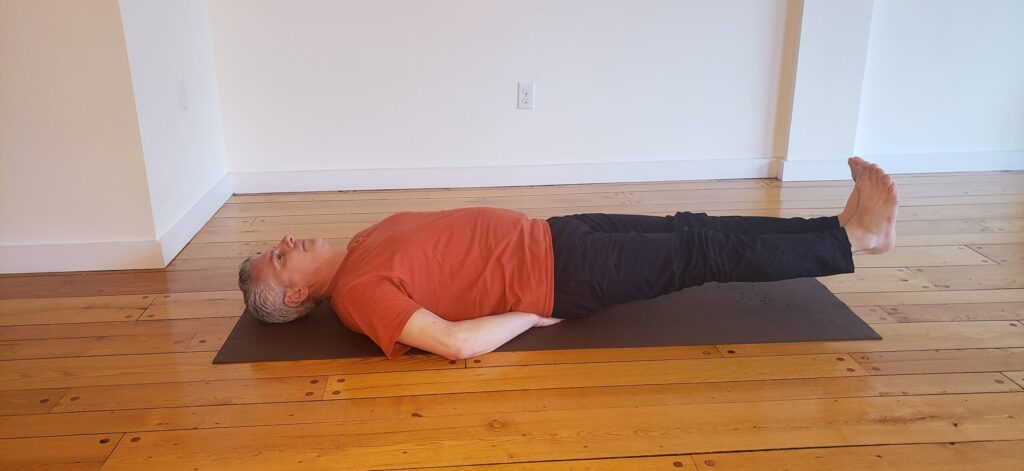
As you lie on the floor, bend your knees and place the soles of your feet about 12 inches forward of your hips. Raise your hips and slide your hands (palms down) under them with your hands framing your sacrum. Rest your hips on your hands. Extend your legs.
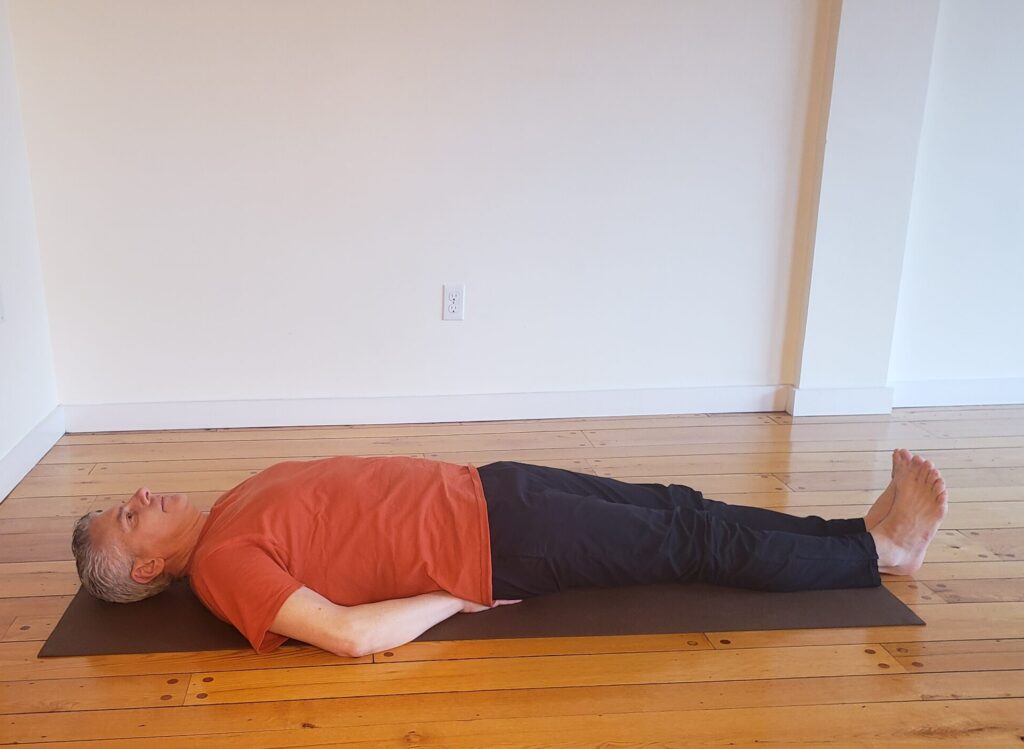
Hug your legs close together if you can, as if your legs had become one leg. It’s easier to lift your legs in tandem than separately. Flex your feet.
Engage your abdominal muscles by pulling your navel toward the floor. You want to keep your lower back from activating so that lifting your legs comes from the psoas muscles, not the lumbar muscles.
Phase 1
As you exhale, extend forward through the heels of your feet and raise your legs about 18 inches off the floor, or about 30 degrees from the horizonal plane. Try to keep your legs fully extended so that your knees don’t bend. This may be challenging. If you feel lower back strain, bend your knees or take one of the modifications below. Maintain this position for about 15 seconds and keep breathing.
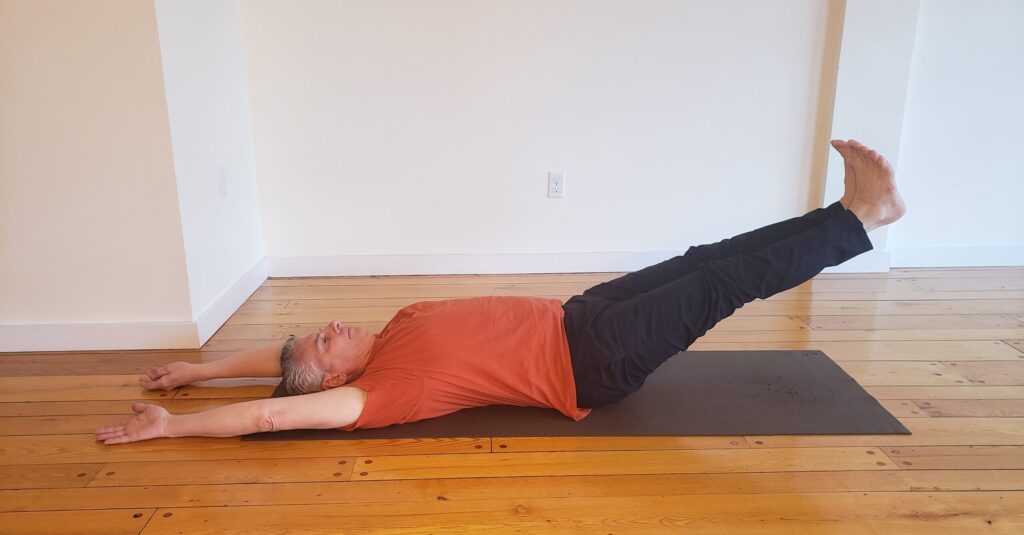
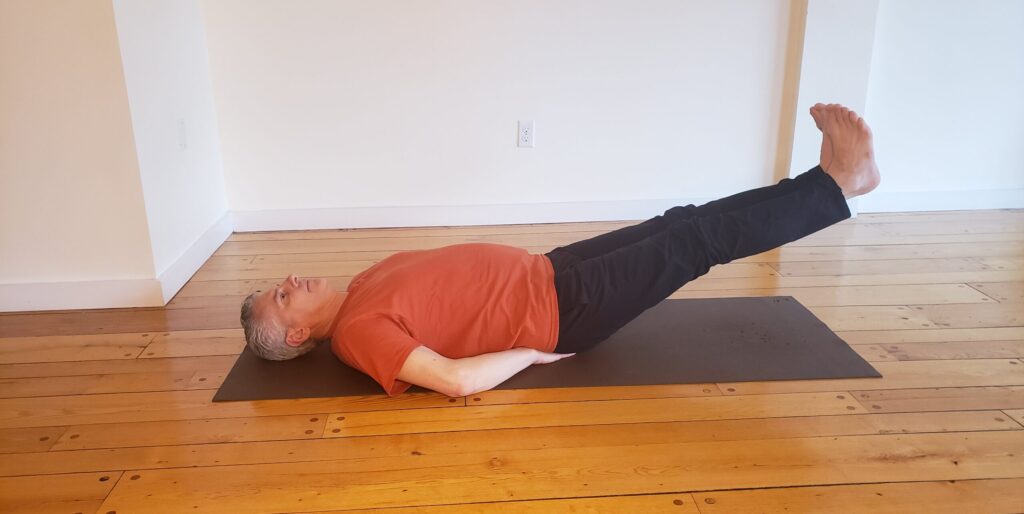
Phase 2
After holding this position, exhale your legs up to about 60 degrees and hold the position for about 15 seconds. This may feel a little easier than the first stage of lift-off. Remember to maintain full extension of the legs if you can and keep breathing.
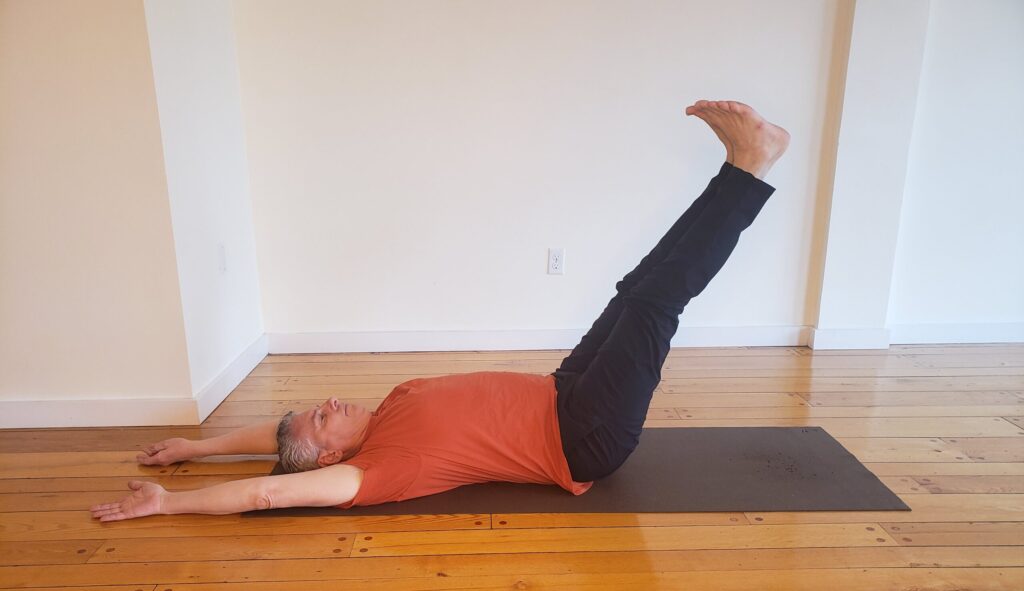
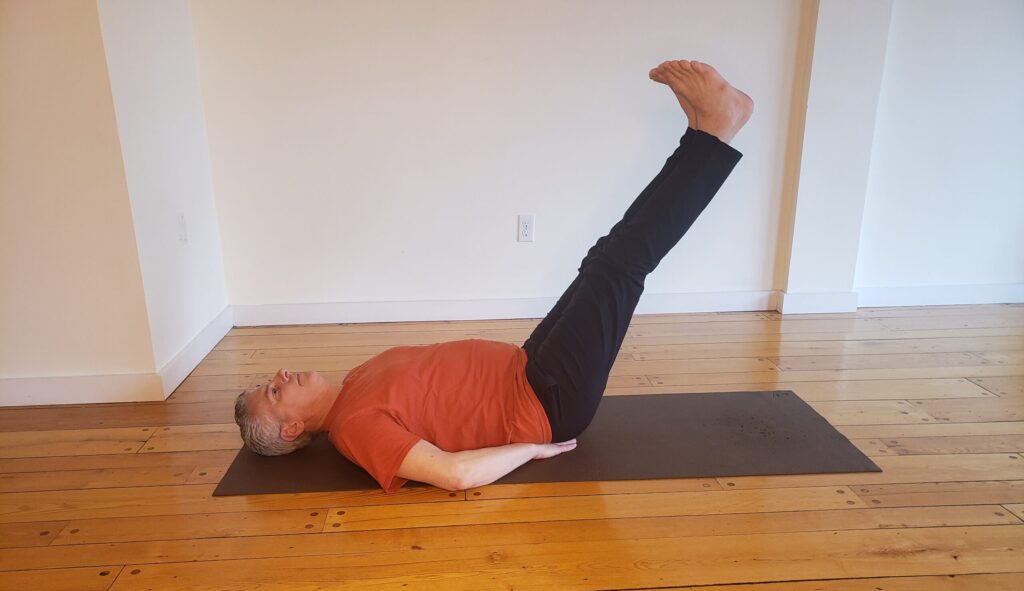
Phase 3
Exhale and raise your legs as close to vertical as you can. I recommend trying to bring your legs as high as possible while maintaining full extension. Again, if you need to bend your knees to protect your lower back, do it! Don’t sacrifice the health of your back. Hold this more or less vertical line in your legs for approximately one minute (or build up to it). Keep your feet flexed as if you were balancing a 20-lb. bag of rice on your feet. If you have your hands under your pelvis, you may find it more comfortable to slide them out while you keep your legs in this position.

The Descent
When you’re ready to lower your legs to the floor, you can place your hands under your hips again if you framed your sacrum for the ascent. Pull your navel toward the floor, fully extend your legs, and take a breath. As you exhale, begin slowly descending your legs to the floor. Keep breathing, as it will likely take longer than one breath to descend.
The closer your legs come to the floor, the more intensely your abdominals will have to work. In other words, it gets harder as you descend. If you feel strain in your lower back, it’s time to bend your knees and bring your feet to the floor. If you can maintain fully extended legs, let them hover a few inches above the floor for a few breaths before gently releasing them onto the floor. Relax your legs, and let your arms come to rest by your sides. Repeat if you feel up to it.
Modifications and Alternate Approaches
If you know you have lower back issues or if you try the traditional approach and find tension creeping into the lumbar area, you should consider the following modifications:
From the Top, Down
Start by lying on the floor with your hands beneath your pelvis (see above).
Bend your knees toward your torso and extend your legs toward vertical. If you can’t fully extend your legs, keep a slight bend in your knees.
Reaching through your heels, slowly lower your legs toward the floor. Start small (say, 10 degrees of movement), then bring your legs back to vertical. Repeat as many times as you like, perhaps increasing the range of motion by 10 degrees until you reach a point where either your knees have to bend or your lower back arches off the floor, indicating that the back is taking over from the abdominals.
Use the Wall
Position yourself on the floor perpendicular to a wall. Start with your hips about 12 to 18 inches from the wall, extend your legs, and let your heels rest on the wall.
Lift your legs off the wall and bring them to vertical. If this feels easy, back your hips a few inches further away from the wall and repeat the motion. Eventually, you’ll find the distance from the wall that challenges your core muscles through the extent of the movement without compromising your lower back.
Once you find the right distance, move your legs through the range of motion from wall to vertical as many times as you can without engaging your lower back.
Lindel Hart teaches yoga online for PerfectFit Wellness. He lives in Western Massachusetts and teaches at Deerfield Academy, a private residential high school, as well as at Community Yoga and Wellness in Greenfield, MA. Visit his website, Hart Yoga.


